Designing a creative banner campaign can be a long, complicated process involving many different people. The longer the process gets, the easier it is to forget certain steps, or ignore certain parts due to time constraints. Thankfully, you needn’t worry any longer. We’ve created this checklist to assist with your creative banner design, so you can make sure you’ve got everything covered, and are working in the most efficient way possible.
Step 1 – Decide on your offer
First and foremost, you need to decide the central point of your campaign. Do you have a specific offer, or do you want to raise brand awareness and profile? Do you have a physical item for sale or a service? You need to think specifically about what you want to achieve first, as it will make the rest of the process so much easier.
Once you’ve decided on the focus of your campaign, it would be normal to think you need to go ahead and work on ideas for the concept, but that would mean missing a vital step in the process, which is to identify your audience.
Step 2 – Identify Your Audience
Before you start thinking about your new banner designs and campaigns, it’s really important to think about who your banner advert is aimed at. If you haven’t already, try to identify your potential audience using Buyer Personas. Once you’ve done this, you’ll have a clear idea of who your audience is, and a persona to aim your ad it. It helps you visualise the users, which in turn helps you design a campaign made especially for them.
Identifying your audience will ensure that you maximise your chances of engagement, as your audience will be more likely to pay attention to your ad if they feel like it’s directed at them. It will actually help with the creative process too, as you can really get into detailed concepts and ideas without having to try and appeal to every single person who would potentially see the banner. This exercise isn’t about putting any limitations on your imagination or potential reach, but it is about maximising every impression on your campaign.
Step 3 – Brainstorm Ideas
Whether you’re working on it with a whole team, or going it alone, it’s now time to get your ideas out there and brainstorm. Write anything down, from vague concepts to tiny details you want to include. Write down every idea you have, and keep writing until the well has run dry. Cross out ideas you don’t like as you go, too, in the hope that most of what you’re left with will be useful in some way.
There are many different ways to brainstorm, and you can find so much advice and guidance on how to do it effectively. One way that almost always gives great results is to start really broad. There are no bad ideas, and no one says ‘no’ to anything. From here, focus on each idea, and pick a handful to go to the next stage with. Then open it out again, and come up with the details for each of these ideas. Again, there are no bad suggestions at this point, as the next stage drills down into each idea to decide whether to finalise it. After this process, you should be left with a near fully-formed idea, with necessary details and a solid overall concept.
Now you should be left with a board, or a few pages, or whatever you and your team decided to write on, which is bursting with ideas. Maybe some sketches of how the campaign will look, along with places where it would be good to buy ad inventory. You should have a few copy ideas there too, and maybe a rough framework of how the campaign will work overall. Will there be one banner? Multiple? Will you utilise Live Banners? Videos? Is it purely a banner campaign or will there be other media? These are the kinds of questions to ask yourself and the team whilst you’re brainstorming. Chances are there’s no definitive answer at this point, and all options are worth considering, depending on how they fit in with your target audience.
Step 4 – Conceptualise
Now it’s time to narrow your focus, and work through all of the ideas from the brainstorming session. Some will work, and some won’t, so be prepared to cast aside some really good input (saving it for future campaigns, of course). Get your best, or most suitable ideas in front of you, and mould them into an overall concept.
This should include a rough framework for the campaign. Sketches of what the banners will look like, what kind of sizes they will be, and a design concept including the type of image or video you’d want to use. Also, as part of the campaign framework, decide where you want it to appear and why. After conceptualising, you should have a clear idea of where to start with your designs, and where you want them to go.
Step 5 – Choose your format
You have your framework, and a clear idea and vision of what you want to do, so now you should be looking into which format suits your aim the best. If your campaign is going to be mainly mobile focused, maybe you want to include more interactive elements with rich media, so users can swipe and manipulate the ad. Are you using pictures or would a video suit your message better? Will a straightforward, static banner work for you or does it need to be animated?
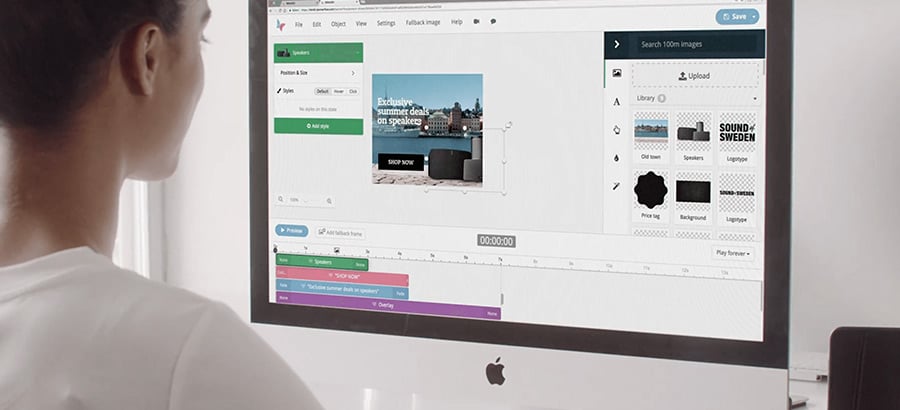
For some marketers this is one of the biggest decisions, as it can determine whether or not you have a huge time investment on your hands, but in truth, it doesn’t need to be so seismic. By using Bannerflow, it takes minutes to edit sizes or insert videos, and there’s no need to republish. Everything is altered in real-time.
Step 6 – Size it up
This goes hand in hand with the format. Depending on where you’re putting your ad, you’ll need to size it appropriately. The best thing to do in most cases is to create a whole range of sizes which are also responsive, but without the right software this can take a lot of time. You or your design team would have to code each individual size and refit all of the elements within, so everything remains in proportion. Understandably, many marketers avoid this as much as possible due to the sheer amount of time it takes.
If you use Bannerflow, however, this process takes minutes. It’s merely a case of selecting another size and using the original as a template. All elements and animations will be brought in automatically, and scaled, but if you want to check to make sure everything still looks the way you want it then that’s possible. It only takes seconds if you do want to make changes too.
Step 7 – Design
Now for the fun part. You have your sketches, your planned sizes, and your chosen formats, so it’s time to design. First, you and the creative team decide on a final plan, and start to source anything you need externally, like a video or picture of specific location. Then you need your copy, whether that’s just for the call to action or something a little more in depth. As long as you always know who you’re talking to, in terms of your audience, this part should come naturally. If you can’t decide between a couple of ideas, try both! You can either field them to the rest of your business, or do some live A/B testing.
Then you need to bring all of your elements together and create your banner. Depending on your software, and the complexity of your ad, this can take anything from minutes to days. Minutes if you are using Bannerflow, as you drag and drop your elements onto a ready made canvas, with no coding. Days if you’re doing everything from scratch and coding for each individual element and size.
Some things to consider in the design are how effectively you are using the space you have, and how your positioning will work. Effective use of negative space can really catch the eye, and can be used in really imaginative ways. If you’re doing it well, you’ll make the user really look at your banner, as it will have more to it than initially meets the eye. Positioning of your various elements is really important too. Where will you put your call to action? Do you want copy at the top of the banner, or to the right? Do you need to shorten your text for it to look more appealing? There’s no right or wrong answer, and every ad is different. First and foremost, ensure you and your team is happy with the look and layout, and proud of the campaign.
This step is so important overall, as this is where you bring together everything you’ve been working on. You want the ad to run perfectly, and to be pitched at exactly the right level for your audience. Whichever way you and your team decide to work, make sure that you’re previewing everything, and that you’re not allowed to make changes and sacrifice things you loved in the initial stages. Check every little detail, and make everything look amazing, as this banner is the key to your campaign’s success. You need it to demand the attention of your audience, and engage them enough to interact with it. Succeed in this, and your campaign will perform fantastically well.
Step 8 – Text and Translation
After you’ve finalised your master banner, you’ll need to think about all the different places where it’ll be shown. If you’re keeping it restricted to your local market, you don’t need to worry about this, but if you’re going international with your campaign, you need to think about localisation.
This isn’t as simple as just putting your carefully crafted copy into Google Translate. As good as that is, it can’t pick up on the nuances of a language, you generally get more of a gist of things than a like for like translation, so you’ll probably need to send to translators to get the job done well. This has design implications too, as word length varies from language to language, and some can change the look of an ad completely, so you need to be mindful of this when asking for the translated texts.
When you’ve got all your translations back, if you’re not using dedicated software, you then have to manually create banners in every size, for every language, which is a huge task. This is something which Bannerflow excels at, as scaling up campaigns and translating them takes minutes, rather than days. This frees up more of your time to spend on the fun parts of a creative banner design.
Even if you don’t need translations, you may still want to utilise this sort of functionality to try different versions of your text to appeal to the different segments of your audience. For there you can measure the performance of each and see which copy performs the best, too.
Step 9 – The Final Checks
Everything else is finished, so you just need to check through all of your banners, and preview them. If they’re all working, and all look as good as you and your team envisioned, it’s time to get them published! You have many, many options here, but in terms of the creative part, you’re all done! Now sit back and watch the audience engage with your amazing campaign.
There it is, your very own step by step guide to making an awesome banner ad campaign. If you want to know more about how Bannerflow can help you, don’t hesitate to apply for a demo today!


